Raspberry pi Temperature Monitor
no code, yet
I wanted to build a wireless arduino temperature logger. Well, I did. Except it was a rasberry pi and it logged to google drive. it was awesome. BUT! i lost the code. No worries, though. Here are my notes. I will clean this up soon...
I bought a raspberry pi and a DHT11 temperature/humidity sensor. Hooked it up and ran it. I used software/instructions from:
The sensor is accurate to 2 degrees C. It takes 2 seconds to get a reading and it isn’t as accurate as the DHT22. But, it was what was in stock at gateway so I used it and am logging data to a google spreadsheet via this code:
import sys
import gspread
import Adafruit_DHT
import time
import datetime
gc = gspread.login('daisy.wood@gmail.com', ‘password’)
sh = gc.open_by_url('https://docs.google.com/spreadsheets/d/1RIvyUzV--PWNfihjMS4OZQD9JKXuPZHTgXKVSc5GCnE/edit?usp=sharing')
worksheet = sh.get_worksheet(0)
sensor = Adafruit_DHT.DHT11
pin = 4
for x in range(2,2000):
humidity, temperature = Adafruit_DHT.read_retry(sensor, pin)

if humidity is not None and temperature is not None:

    print 'Temp={0:0.1f}*C  Humidity={1:0.1f}%'.format(temperature, humidity)

    worksheet.update_cell(x, 1, datetime.datetime.now().strftime("%Y-%m-%d"))

    worksheet.update_cell(x, 2, datetime.datetime.now())

    worksheet.update_cell(x, 3, temperature)

    worksheet.update_cell(x, 4, humidity)

else:

    print 'Failed to get reading. Try again!'

time.sleep(60)
LOL, i need to get code formatting figured out on this site..
Here is the ardunio library and example code: http://learn.adafruit.com/dht
BUT, probably want to do what this guy is doing: http://blog.the-jedi.co.uk/tag/nrf24l01/
In fact, that’s the direction I want to go in. He does use the same temp sensor, which is guess is fine. But, he uses nrf24L01+ and an arduino so that’s the next step I suppose.
This is good, he uses protobufs: http://theboredengineers.com/2014/01/piweather-how-to-communicate-wirelessly-between-an-arduino-and-a-raspberry-pi/
As for WIRED communication between an arduino and raspberry, http://arduino.stackexchange.com/questions/1628/arduino-to-raspberry-pi-wired-communication
thank you for playing.
Interfacing an AVR with an ISA Nic
My first microcontroller project

(This was written in early 2002)
I'd been wanting to play with some embedded systems for quite some time but didn't really know where to start and didn't have any impressive ideas. I mean, really, how many computer controlled thermostats or robots does this world need.
One day I ran across the worlds smallest web server. I thought this was pretty cool and wondered just how hard it would be to internet-enable something with an embedded web server. I went out and bought a TINI to play with some ideas, but it was back ordered... for 3 months. While I was waiting i found the \$25 web server and thought, what the hell, I can do that.
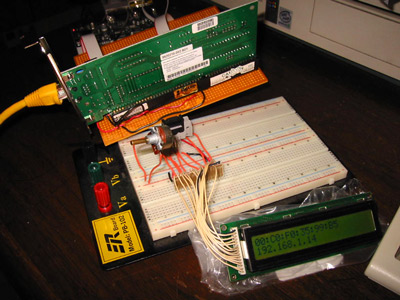
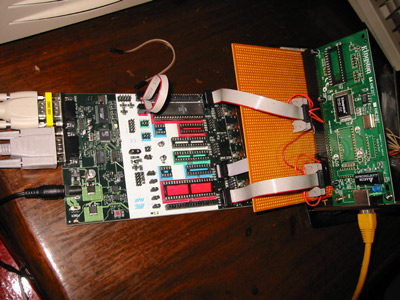
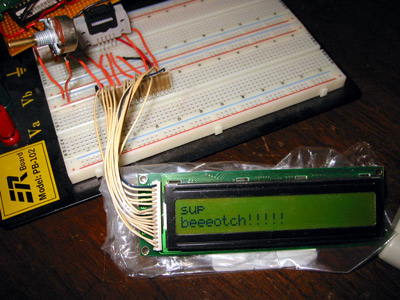
I went out and bought me an STK-500 developer board and an Atmel AT90S8515 8-bit microcontroller chip. Good times... I needed to do something easy with it to get started, so I bought an LCD from a surplus electronics place. It was easy enough to wire up the LCD and write some assembly and C programs to display clever messages to impress my friends.
Anyway, I decided it was time to wire up an old 3com ISA ethernet card I got for free from work and try to "internet-enable" something. I couldn't think of anything cool to hook up so I as stuck.
Then I ran across this. HOT DAMN!!! hooking a nic to an avr and an lcd to display udp messages sent to the nic's IP.. how perfect is that? Thanks Dave, whomever you are.
So, I used that PDF (careful, there are mistakes in there) and info
from
the $25 web server page to wire everything up. It didn't work. Imagine
that. Well, whoever didn't put in big bold letters: 'Hey dumbass, you
need an ne2000 card.' needs to get shot. My 3com card is not ne2000,
whatever the hell that means. So, i got one off ebay for \$1.99, plugged
it in, turned it on and BOOM! the freakin' thing works.
Here's what it does. You compile the IP address in the code and download it to the avr. When you turn it on, the chip initializes the nic and the lcd. It probes the card for a mac address and displays that plus the IP on the LCD. It then sits and listens on port 987 for a UDP packet. When it gets a packet, it decodes it and sends the data to the LCD. I wrote a little java app that will take in a string and send it to an IP using UDP. When you hit send, the message appears on the LCD. How cool is that?


Here's some of Dave's code: ; we have now advanced the read pointer up to the first byte of ; the "data" portion of the IP packet ; ok, now look back at the protocol field and jump to the right ; code to handle the packet type ldi r18,1 ;icmp cp r19, r18 breq ne2k_read_packet_icmp ldi r18,6 ;tcp cp r19, r18 breq ne2k_read_packet_tcp ldi r18, 17 ; udp cp r19, r18 breq ne2k_read_packet_udp
right... needless to say I didn't write any of the code behind this project. I did have to modify it to get it to work, though...
The nic cost \$2, \$8 for the microcontroller, and \$10 for the LCD. Everything else I bought I didn't really need (like the STK-500, breadboard, perfboard, dirty hookers, etc.) but it sure as hell made life much easier.
That's great. Now what?
Now that I've figured out how to work with microcontrollers, and getting some random device to respond to commands sent through the internet I'm well on my way to finally getting my toaster to burn my english muffins from the other side of the planet.